This is the first in a series of posts explaining how to use DICOM Printer 2. It’s a complex tool, with some very simple uses. Despite our best efforts to make the world wholly digital, this is one of the most popular!
Goal
To print true-size images of dental x-ray, with a facility logo in the corner of the film.
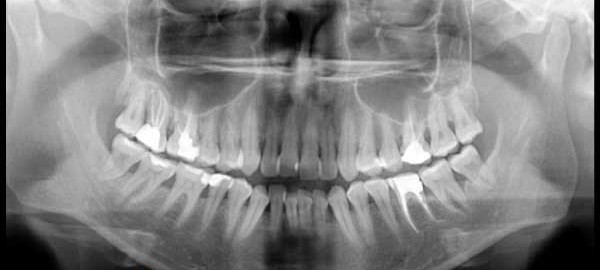
We’re looking to create something like this:
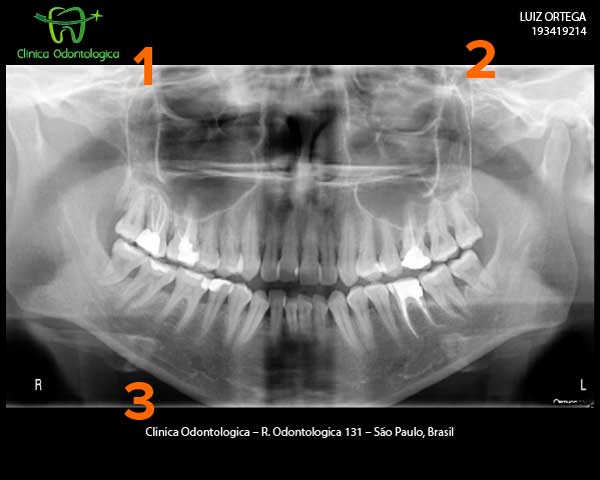
Note that:
1. There is logo at top left.
2. Patient information is outputted at top right.
3. Clinic information appears at the bottom.
This tutorial will go through the few steps required to output the image. We will tackle the logo and patient demographics in a separate post.
Details
Source application: Dental Imaging software, like DBSWIN or SIDEXIS
Destination: AGFA Drystar 5302 (or any other DICOM Print SCP device)
Let’s Get Started!
Collect your imager connection parameters. This means:
- The IP address, AE title and port number of the imager
- Make sure that the DICOM_PRINTER AE title is able to connect to it. You can get help with this part from your imaging vendor.
Download DICOM Printer 2 from our website:
https://store.fluxinc.ca/files
Run the Setup Wizard to install:
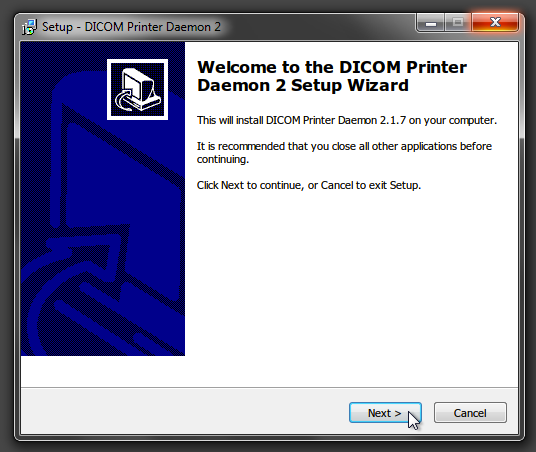
The Setup Wizard will take you through the process and then offer to run the Configuration Wizard. In the first screen, select Film Printer:
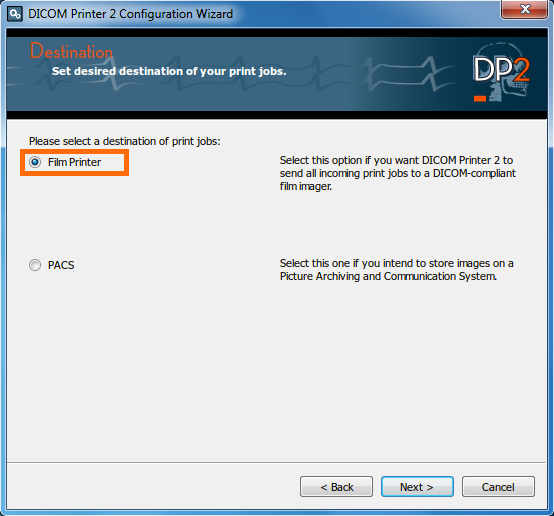
You will be presented with the following screen:
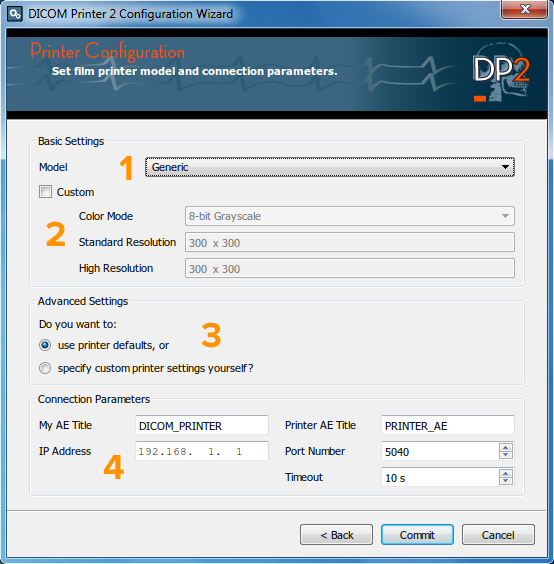
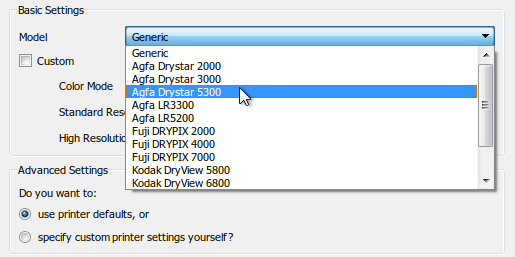
- Select our imager model family from the drop down, e.g., AGFA Drystar 5300. If you don’t see your imager, select Generic, or the closest match from the same vendor.
- If you choose Generic, then be sure to look up your imager dot pitch and enter it into the Standard Resolution field. The best place to find this is usually the imager brochure from the manufacturer website.
If the imager brochure lists the dot pitch in microns, then you can convert this value to DPI using Google. For example, if your imager lists a 50 micron dot size, then Google ’50 microns to inches’, then divide 1 by the result. The answer in this case 1 / 0.00196850394 = 507.9, or 508 x 508.
- You should probably leave the defaults unchanged for this example.
- Enter the Printer AE Title, IP Address and Port Number of the imager.
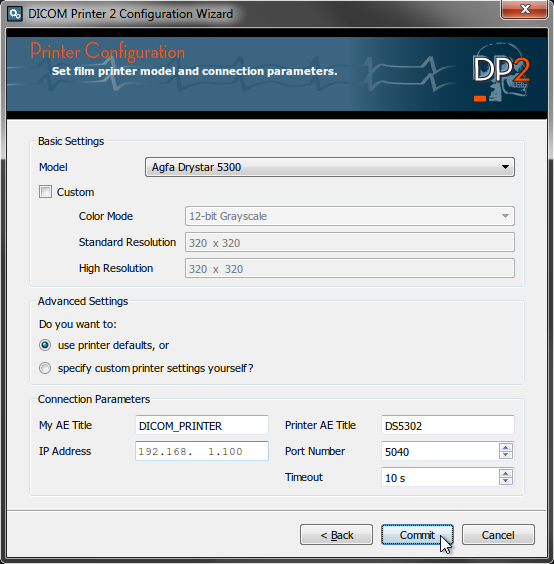
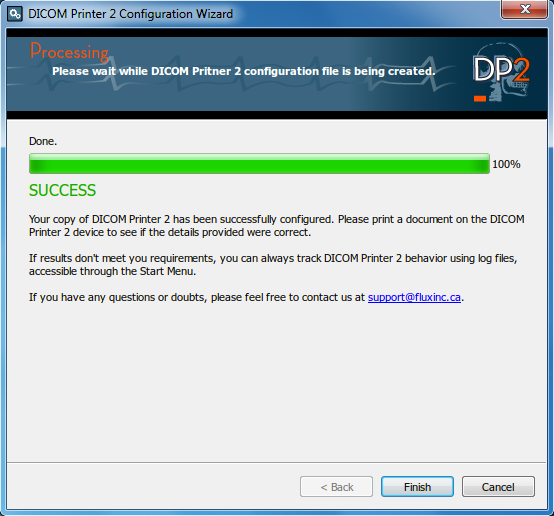
Then click Commit!
You’re Ready to Print!
Launch your application and Print, then select the DICOM Printer 2 printer from the print dialog.
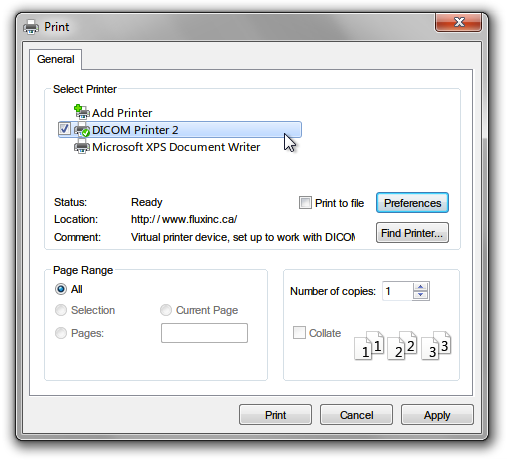
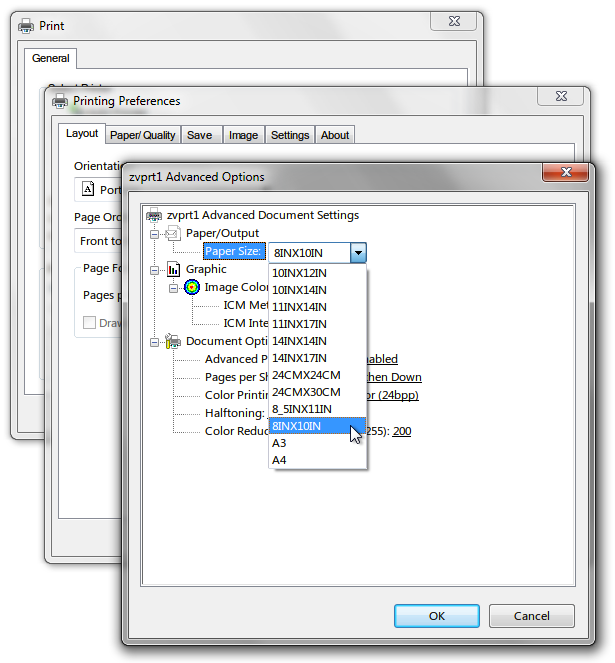
Please ensure to select the right film size!