In order to automate DPX storage to PACS, we first need to ensure that a patient ID appears on reports. This guide explains how to enable the ID, and have it appear on reports. Let’s get started.
Configuring the DPX Software
The LUNAR software provides three possible fields to store a patient ID or MRN: Social Security ID, Facility ID, and Department ID. Although none of these actually meet the definition of MRN, we’ve decided that Facility ID is the closest, so let’s use that.
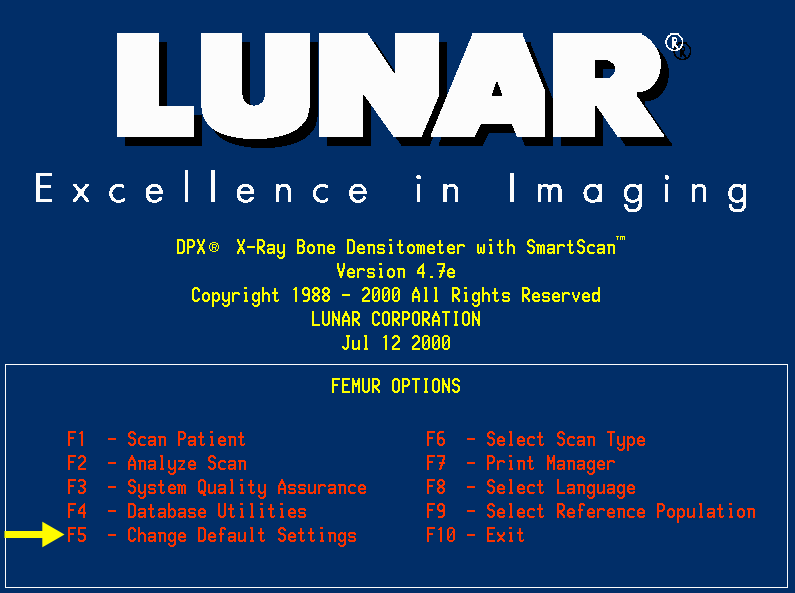
- Run the DPX software and at the main menu, press F5 to Change Default Options
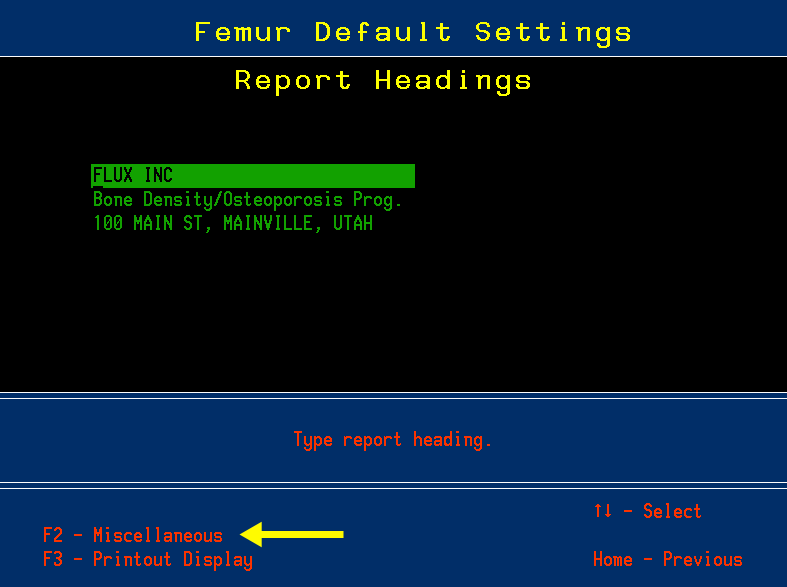
- Next, press F2 to go into the Miscellaneous options
- Then use the arrow keys to highlight Patient ID Type
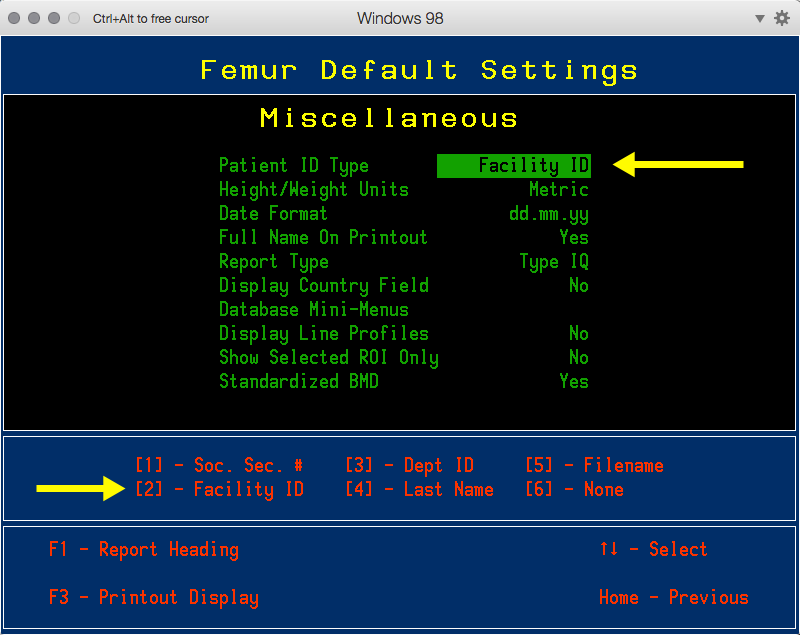
- Press 2 to select Facility ID
- Then press Home to return to the previous screen. You will be asked to Save data
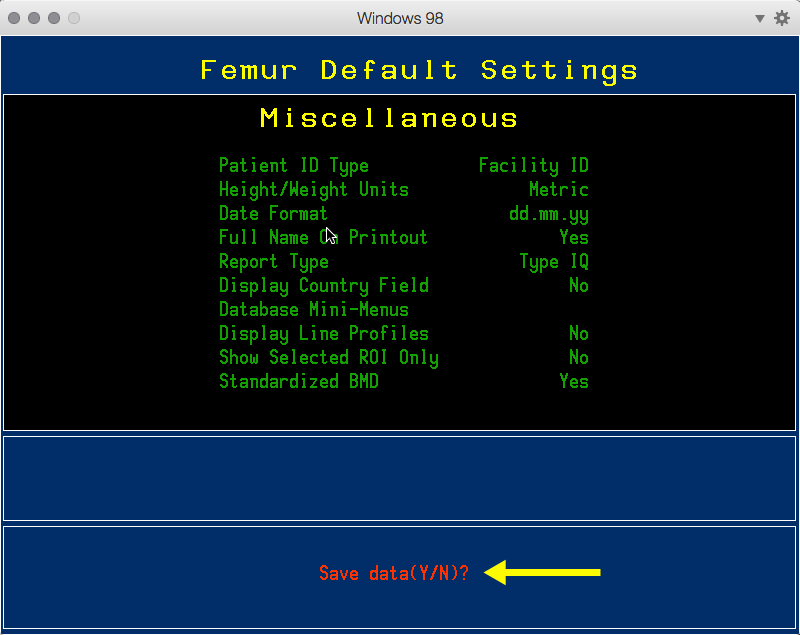
- Press Y to save.
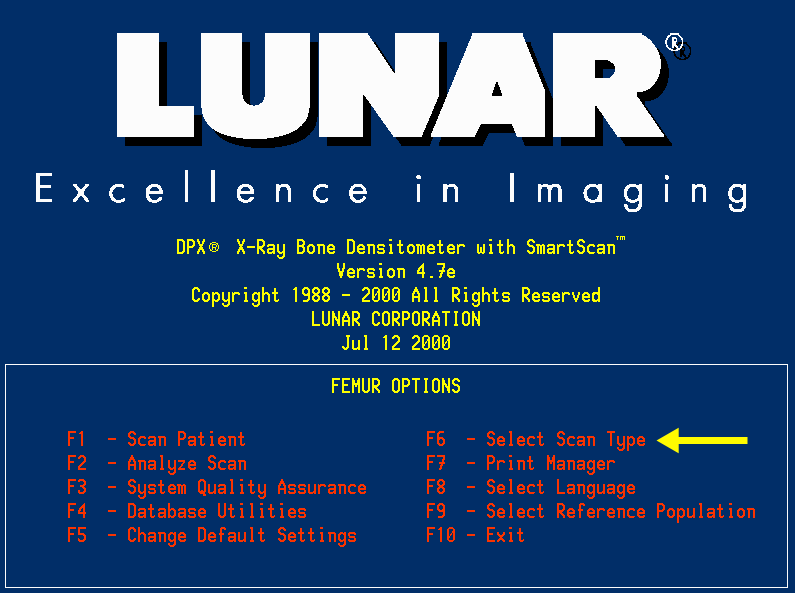
- You have just completed enabling the Facility ID for the first type of report – in our case, this was the Femur.
- Back at the main screen, Press F6 to Select Scan Type
- Then use your arrow keys to select AP Spine
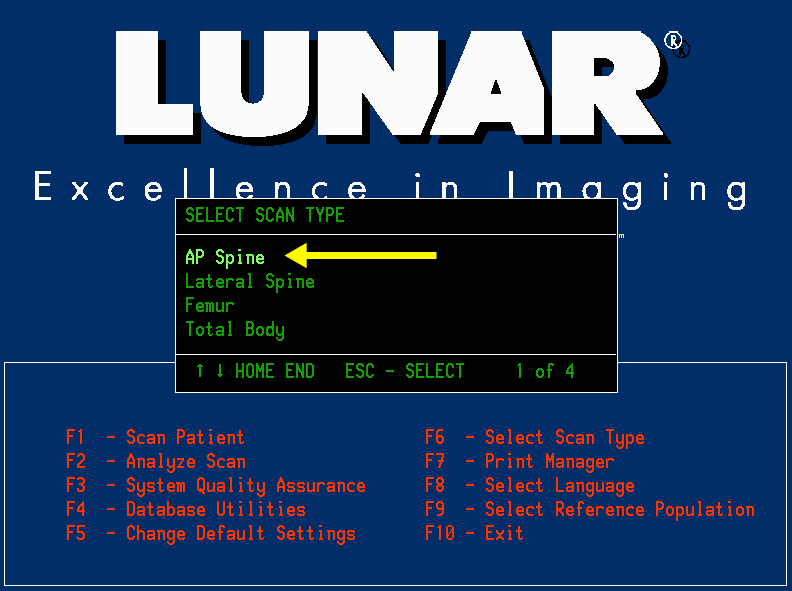
- Press ESC to select and return to the main screen
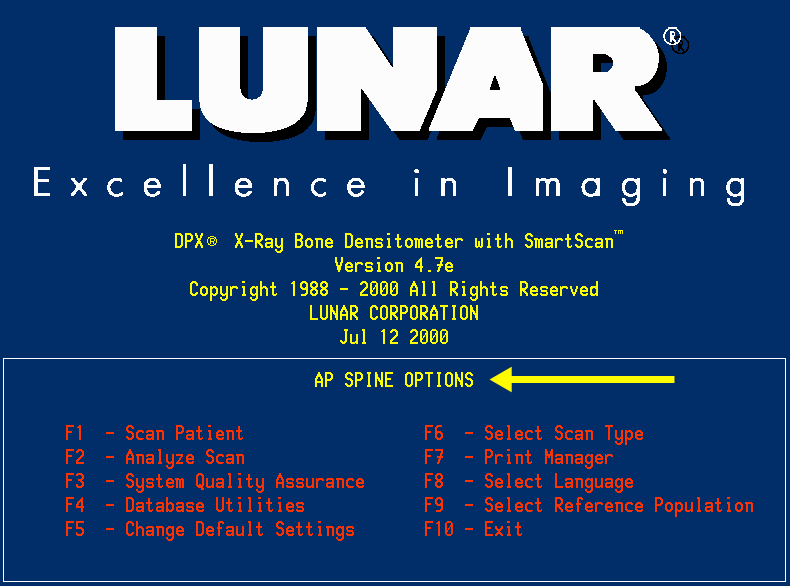
- Ensure that you have indeed changed to the new scan type.
- Repeat steps 1 through 8 until you have changed the Patient ID Type for Femur, AP Spine, Lateral Spine and Total Body scan types.
During Your Exam
Now that you have enabled the facility ID on your reports, you will need to make sure that you enter it into the patient demographics at the commencement of your exam.
To do this:
- Fill in the usual Mandatory Information normally
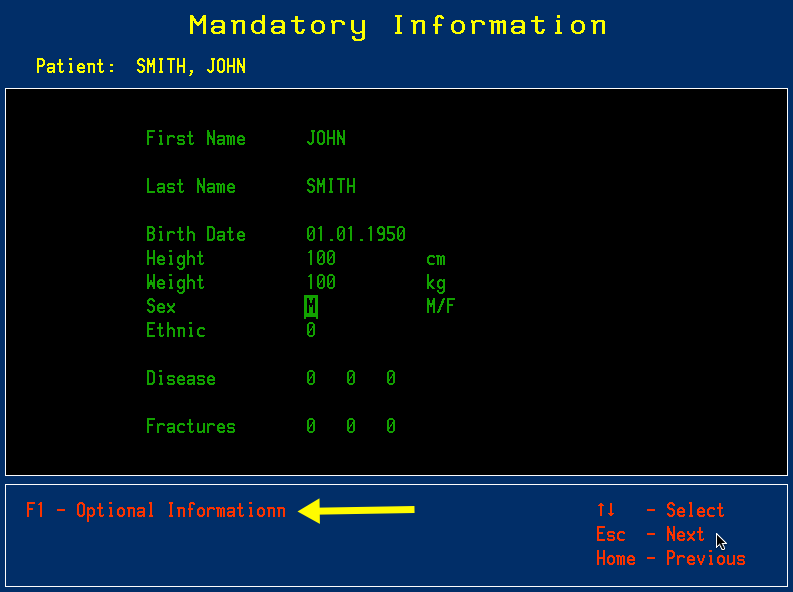
- Then press F1 to go into the Optional Information screen – don’t press ESC!
- Enter the Facility ID into the second optional field
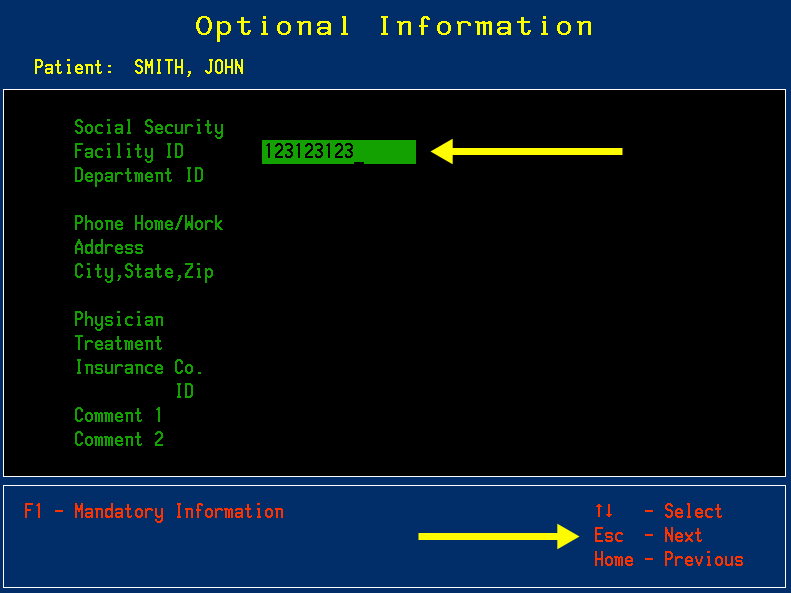 Careful, this has to match the patient MRN that will appear in your worklist and PACS.
 - Press ESC to continue to your scan.
- When you’re finished with the analysis, print as usual.